When we purchase a dedicated server, the host provider usually provides IPMI to install the operating system. There are two advantages to using IPMI to install the operating system: first, we can freely choose the operating system we want, such as Linux or Windows; second, IPMI can save the cost of having the host operator operate it, and we can try it again if it breaks down. Just install it.
I purchased a stand-alone server some time ago, and the host provider happened to provide an IPMI interface. Since it was my first time to use it, I still encountered a lot of problems during the use. It is strange that there are very few tutorials on the installation and use of IPMI on the Internet, and due to the long history, many operations have been different from the current IPMI, causing a lot of trouble.
This article will share the process of installing the CentOS operating system using IPMI on an independent server, which involves enabling JAVA in the browser to run iKVM, partitioning the hard disk of the independent server, and manually mounting the operating system ISO.
More information about the independent server installation panel and methods of setting up a VPS host include:
- Server virtualization panel SolusVM installation and use - supports new management of OpenVZ, KVM and Xen VPS
- Use SolusVM to set up a NAT VPS host on the server/VPS - integrate WHMCS to sell NAT VPS
- Virtualmin/Webmin is a powerful server management panel - Unix system graphical management
The server is suitable for customers with large traffic. If you are an individual, it is better to choose VPS. Here is a comparison list for reference only: VPS host ranking list.
PS: Updated on November 21, 2018, After installing the operating system on the independent server, we can then use SolusVM to virtualize the VPS host, so that we can sell the VPS: SolusVM installation diagram Tutorial and method of activating KVM VPS host - SolusVM master and controlled installation process.
PS: Updated on December 11, 2018, The method in this article is operated on the DediPath independent server. Regarding the DediPath server evaluation, please refer to: DediPath independent server evaluation - Los Angeles independent server performance, speed and route evaluation.
1. IPMI management address
After purchasing a dedicated server, the hosting provider will send the IPMI management address, account number, and password to your email, or you can directly go to the hosting management backend to view it.
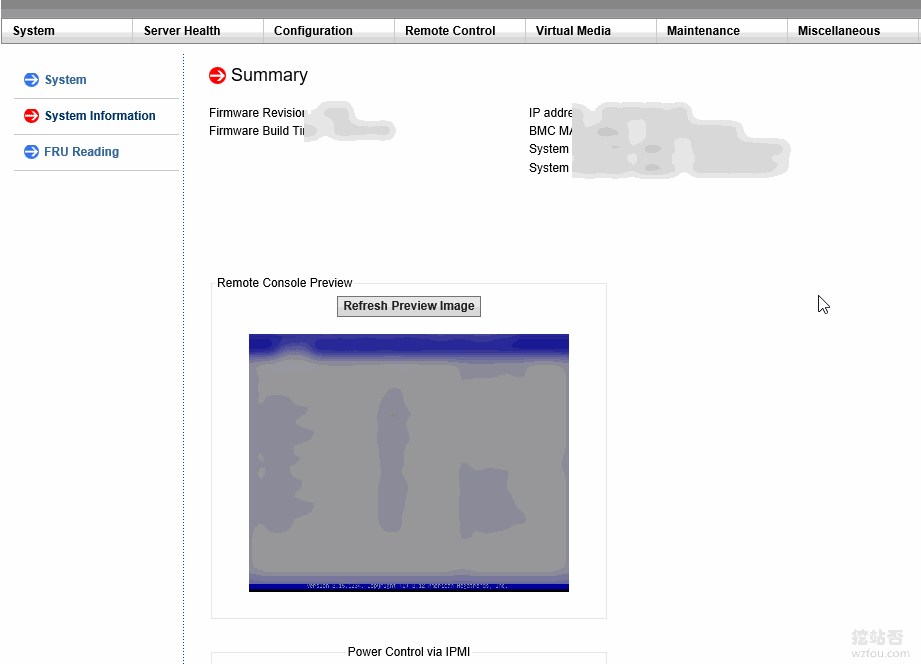
Use Firefox 51 or below to open the IPMI management address. IE 10 or below can also be used, but Chrome basically cannot. The reason is that major browsers do not support Java one after another. There will be solutions below.

This is the IPMI management panel. If prompted to enable Java, please follow the steps below. (Click to enlarge)
2. Enable IPMI JAVA console in the browser
- Java: https://java.com/
- Whether to support Java: https://java.com/zh_CN/download/installed8.jsp
After installing Java on the local machine, restart the browser, and then open the above test URL to see if the installation is successful. If not, please check whether browser support is enabled in the Java security configuration, and remember to add your IPMI URL in the exception.
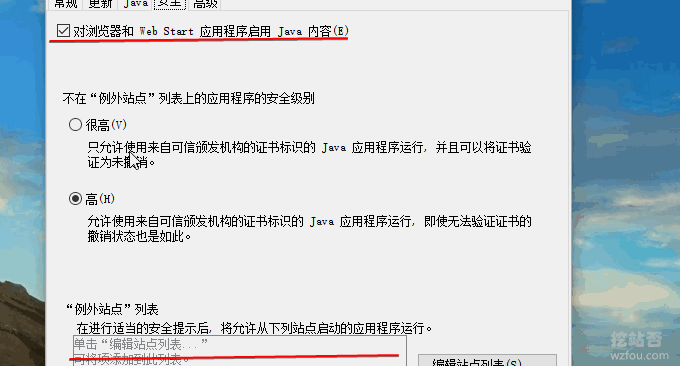
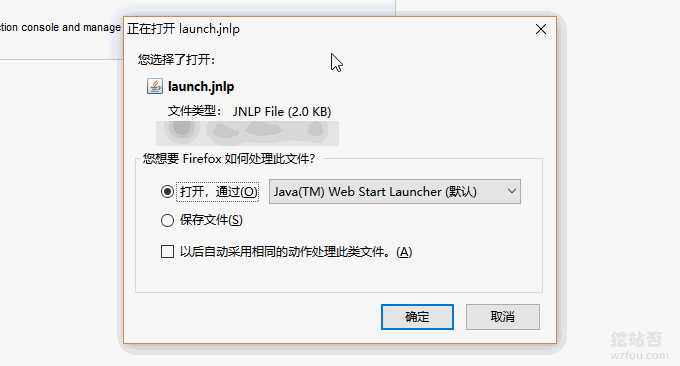
If there is no problem, enter the remote control in IPMI and click to open the Java console.

Prompts you whether to download and run. Sure.
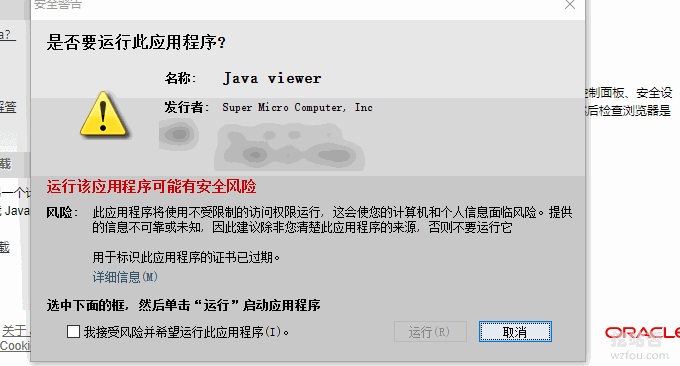
Continue to select Run.
3. IPMI iKVM mount ISO
- Alibaba Cloud CentOS mirror: http://mirrors.aliyun.com/centos/
The following is the IPMI iKVM management panel. We click on the upper left corner and select Load ISO from local. If the production server has large memory (more than 4G of memory), it is recommended to install the CentOS-6.8-x86_64-minimal.iso version.
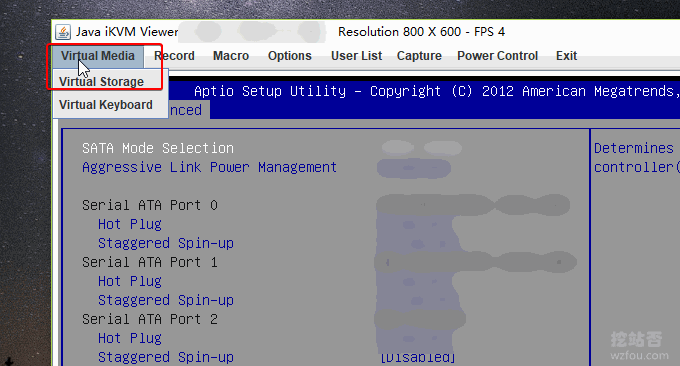
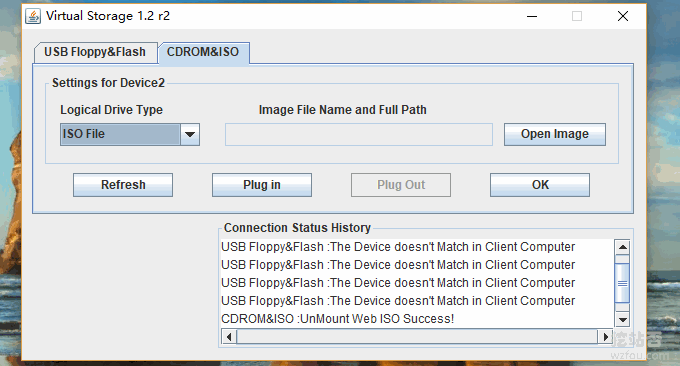
Next, we select the CD ROM on the right and select the ISO file. If it is gray, please click "Pull Out". Then click Open and select the local ISO file.
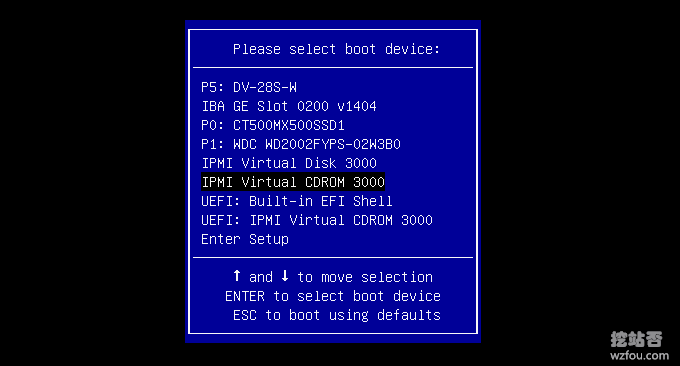
After completing the ISO mounting, click "Macro" and select "ctrl+alt+del" to restart the server. During the restart process, press the F11 or Del key to enter the startup item selection. We can choose from CD ROM.
4. IPMI installation operating system
After IPMI mounts the ISO and restarts the server, it will automatically enter the operating system installation interface. Here wzfou.com uses CentOS 6.8 as a demonstration (CentOS is selected for the subsequent SolusVM panel installation).
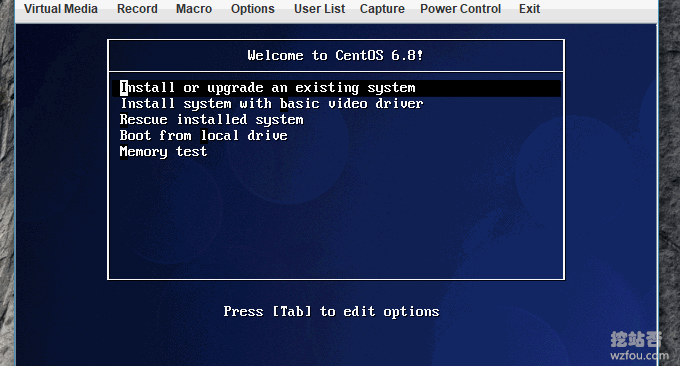
Just click Next.
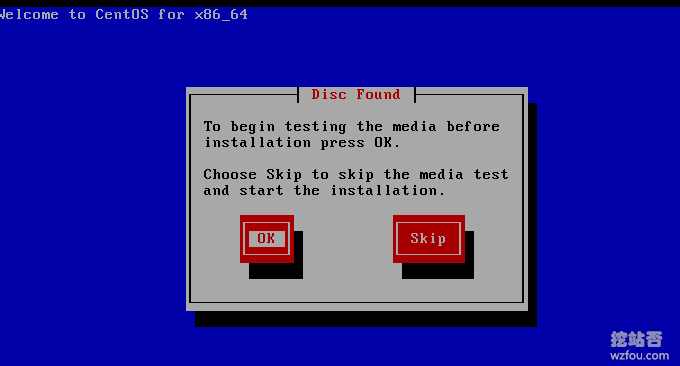
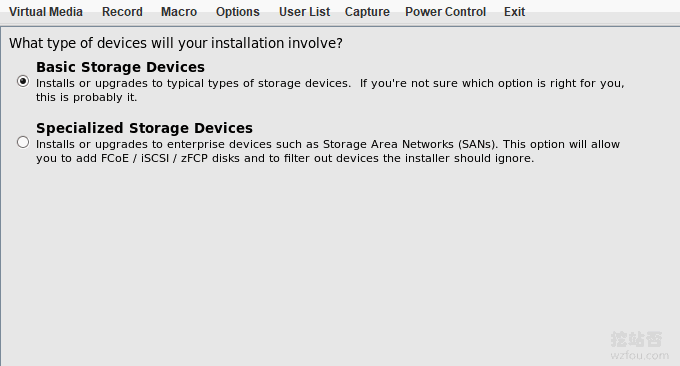
Select the hard disk, and the second one is to specify the hard disk type yourself.
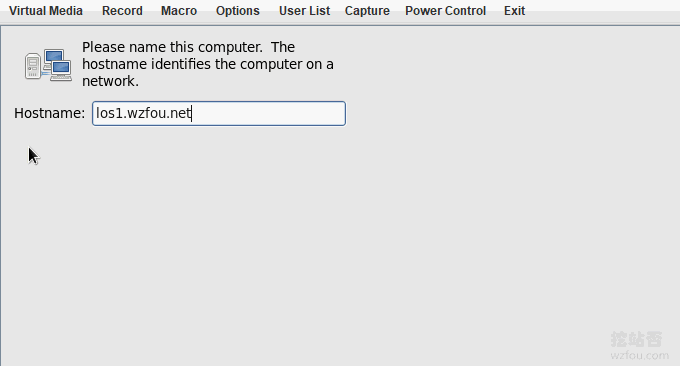
Set the server's hostname.
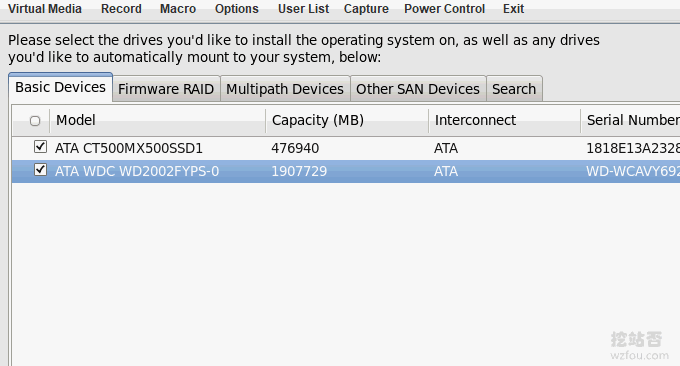
If you selected the second one in the previous step, you will be asked to select the hard drive here. Remember to check both.
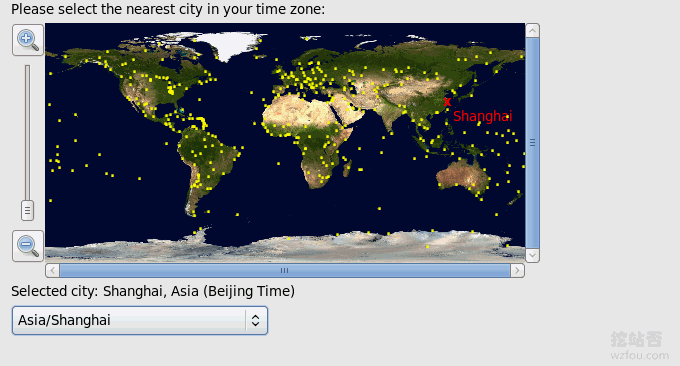
Set a time zone, select Shanghai time zone, and uncheck "UTC Clock" below.
Set an operating system password.
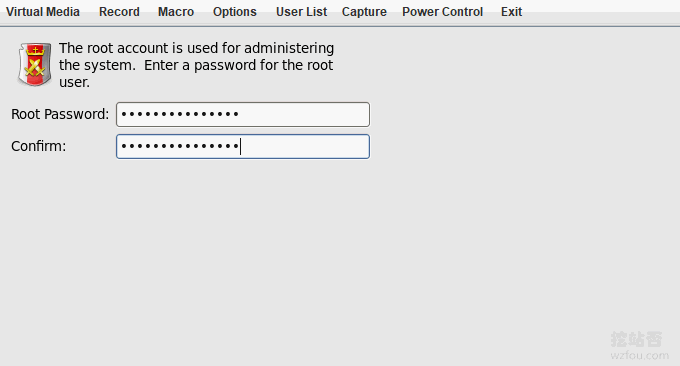
5. IPMI hard disk partition
Following the previous step, we will be asked to select the IPMI hard disk partition. We usually choose the last one to specify ourselves.
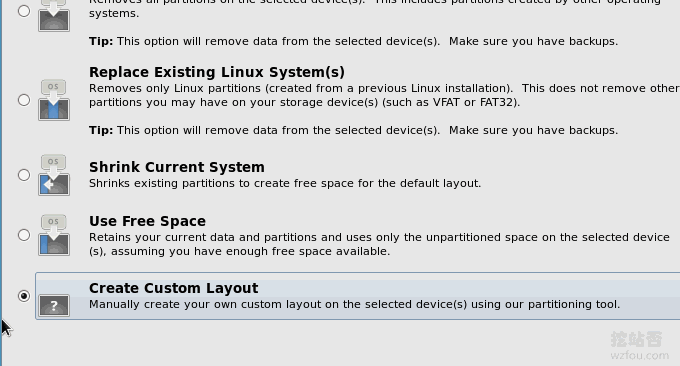
Then delete the original partition and restart partitioning on Free.
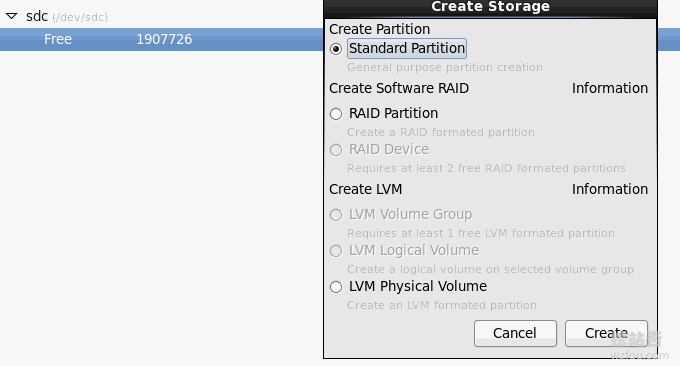
Regarding the SWAP partition, it is generally suitable to have 2 times the memory. Of course, it can be larger or smaller.
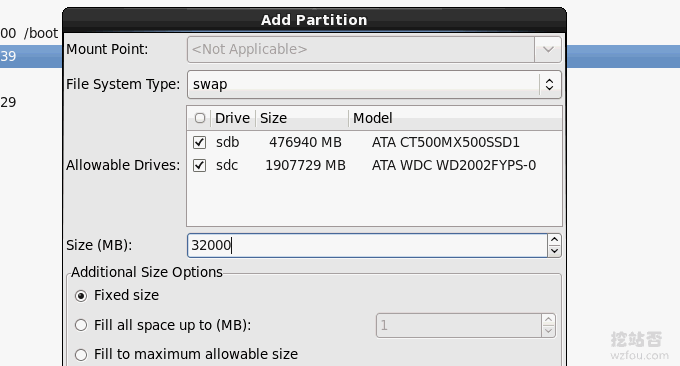
If you want to install the SolusVM panel on a stand-alone server later, please read the following partition requirements carefully. (From the official website: https://documentation.solusvm.com/display/DOCS/Partitioning)
Xen PV/HVM Host
/ 80GB+ (XEN templates & iso's will be stored in /home/solusvm/xen)
SWAP 4GB max (Virtual servers won't use the host swap)
Logical Volume Group (LVM) remaining space (Logical Volume Group Only, SolusVM will create the logical volumes for the virtual servers inside this group)The PE Size should be set to 128M not the Default of 4M, if manually creating the Volume Group you can use the ‘-s 128M’ flag.
KVM Host
/ 80GB+ (KVM templates & iso’s will be stored in /home/solusvm/kvm)
SWAP 4GB+ (Virtual servers may use host swap if there is a real memory shortage)
Logical Volume Group (LVM) remaining space (Logical Volume Group Only, SolusVM will create the logical volumes for the virtual servers inside this group)The Volume Group Name CANNOT be KVM as /dev/kvm/ is a directory created on install.
The PE Size should be set to 128M not the Default of 4M, if manually creating the Volume Group you can use the '-s 128M' flag.
OpenVZ Host
/80GB
SWAP 2 times RAM (if RAM ⇐2GB otherwise RAM + 2GB is plenty)
/vz remaining space (templates & virtual servers will be stored here)
Here I use SolusVM to set up a KVM VPS to demonstrate. The "/" root directory must be mounted at least 80GB, and the SWAP must be at least 4GB. The remaining space is all allocated to LVM (only the Logical Volume Group is configured, and the specific volume will be configured by Solusvm Create it yourself), Solusvm recommends using a PE (Physical Extent, physical block) size of 128MB.
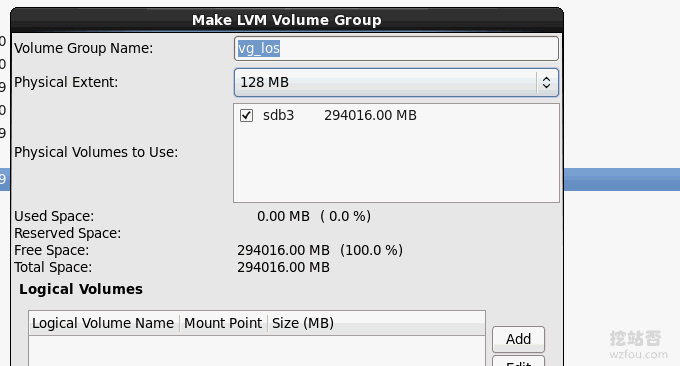
In the end, this is pretty much what partitioning a standalone server for SolusVM looks like. (Click to enlarge)

Confirm the written data.

Confirm the installation guide.
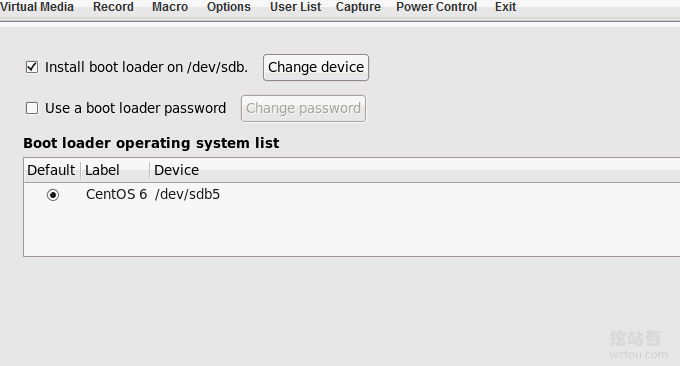
Complete IPMI installation of the operating system.

6. Server configuration IP address, gateway, DNS
PS: Updated on January 11, 2019, This part involves Linux network configuration. For related command usage tutorials, refer to: VPS host and independent server network configuration method-Linux manual setting of IPv4 and IPv6 addresses.
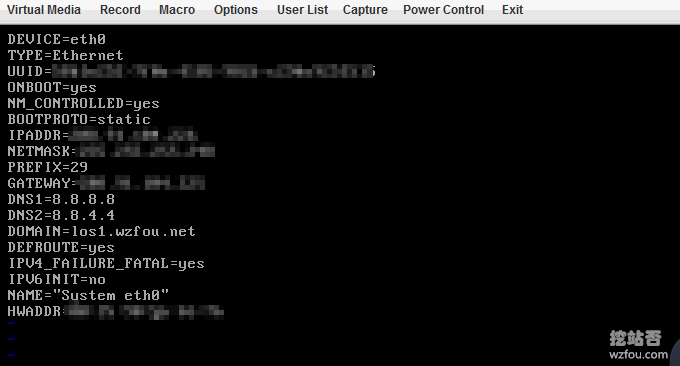
After the CentOS operating system is installed, you still need to manually configure the IP address and NS server (some students may also notice that the network can also be configured during the CentOS installation process). The basic operation commands are as follows:
vi /etc/sysconfig/network-scripts/ifcfg-eth0 #Edit the configuration file, add and modify the following content
BOOTPROTO=static #Enable static IP address
ONBOOT=yes #Turn on automatic network connection
IPADDR=192.168.21.129 #Set IP address
NETMASK=255.255.255.0 #Set subnet mask
GATEWAY=192.168.21.2 #Set gateway
DNS1=8.8.8.8 #Set the primary DNS
DNS2=8.8.4.4 #Set up DNS
IPV6INIT=no #Disable IPV6
:wq! #Save and exit
service ip6tables stop #Stop IPV6 service
chkconfig ip6tables off #Disable IPV6 startup
service yum-updatesd stop #Turn off automatic system updates
chkconfig yum-updatesd off #Disable startup
service network restart #Restart network connection
ifconfig #View IP address
As shown below:

The server can set a unified and standardized host name:The host name is set here: bbs.hz.m.wzfou.com
1. hostname “bbs.hz.m.wzfou.com”
#Set the host name to bbs.hz.m.wzfou.com
2. vi /etc/sysconfig/network #Edit configuration file
HOSTNAME=bbs.hz.m.wzfou.com
#Modify localhost.localdomain to bbs.hz.m.wzfou.com
:wq! #Save and exit
3. vi /etc/hosts #Edit configuration file
127.0.0.1 bbs.hz.m.wzfou.com localhost
#Modify localhost.localdomain to bbs.hz.m.wzfou.com
:wq! #Save and exit
shutdown -r now #Restart the system
7. Precautions
The ISO installation process is slow. This is because the local ISO mounted through CD ROM is uploaded and installed during the installation process. If the domestic network speed is used to connect to foreign countries, it will take a lot of time to upload an ISO. It is best to upload it in advance or use a foreign network. VPS upload ISO.
The network cannot ping . Choose to check whether your DNS is set correctly, and then check whether Ping can ping the IP address. If both of these are "centos destination host unreachable", check the routing and contact the host provider in time.
