
Many friends may not have heard of FFmpeg, but you must have used one of these software: Baofeng Yingyin, QQ Yingyin, KMP, GOM Player, PotPlayer (2010), KMPlayer. FFmpeg is open source software, and software that uses FFmpeg in accordance with the agreement must also be open source. However, these audio and video software do not comply with the agreement, so they were put on FFmpeg's "blacklist".
FFmpeg is a leading open source framework for audio and video multimedia processing, using LGPL or GPL license. It provides rich functions such as audio and video collection, encoding, decoding, transcoding, audio and video separation, merging, streaming, filters, etc. It includes a very advanced audio/video codec library libavcodec, which has very high reliability. Portability and codec quality make it a multimedia processing artifact.
At the same time, FFmpeg also provides command packages, which can be used on Windows, Linux and other platforms. Many people think that FFmpeg is difficult to use. In fact, as long as we install the FFmpeg command tool, we can quickly implement video format conversion and video compression on Windows. And convert between videos and pictures.

For more webmaster tools and webmaster software, here are:
- Essential skills for webmasters to add watermarks to pictures in batches - XnView and Meitu XiuXiu batch processing methods
- Best editor for WordPress: Install and use Windows Live Writer (Windows 10)
- Take screenshots worry-free with Yisoft: ShareX screenshot tool - short, concise and full of functions. Automated tasks can capture moving images and videos.
1. FFmpeg software installation
website:
- Official website: https://ffmpeg.zeranoe.com/builds/
- Alternate download: https://wzfou.com/down/ffmpeg64 (64-bit)
After entering the website, select the version you want to install, which supports Windows 7 and Mac OS X 10.10 and above.

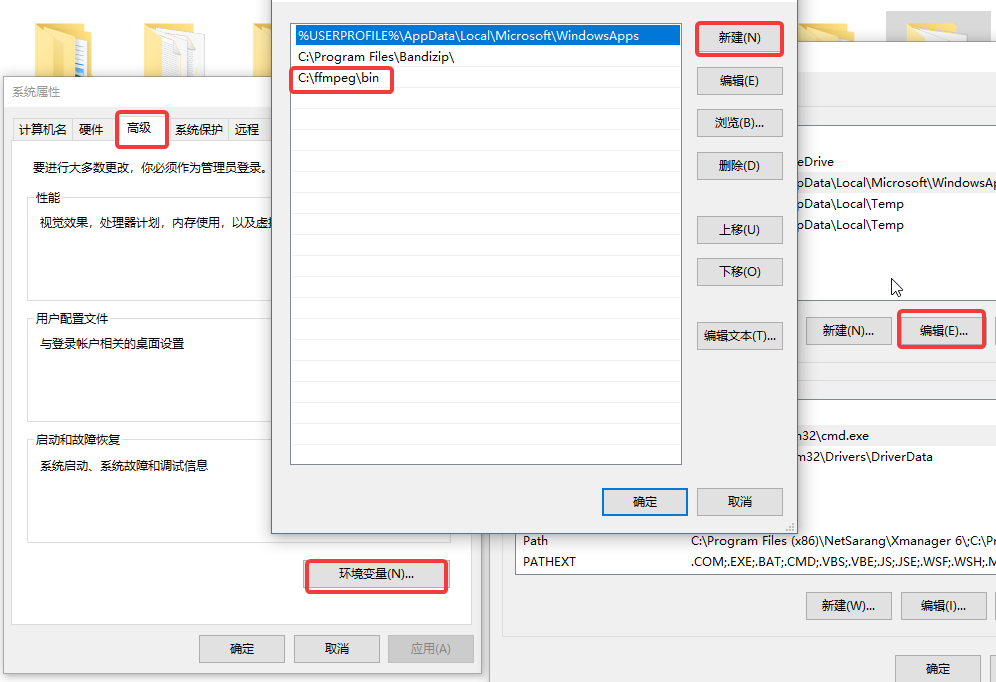
Unzip the downloaded compressed package to obtain the ffmpeg-xxx-win64-static folder, rename it to ffmpeg, and then place the ffmpeg folder into the program folder, for example, the placement path of wzfou.com is: C:.

Open the environment variable settings page: Explorer > This PC > Right-click - Properties > Advanced system settings > Environment variables. Double-click the Path item to enter the editing page, select New, paste the path C:ffmpegbin into the input box and confirm to save. (Click to enlarge)
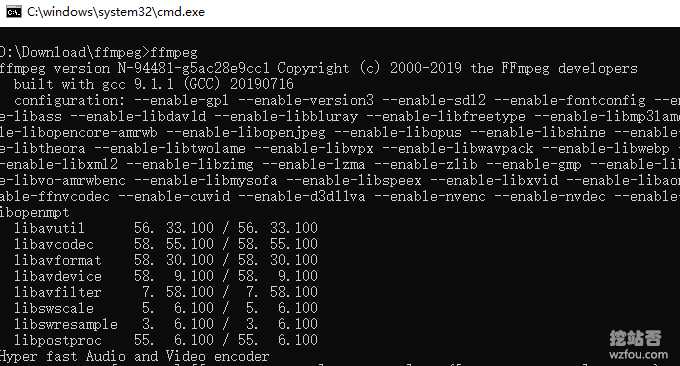
Now open your CMD, enter ffmpeg and press Enter to execute. If you see a return message, it means you have successfully installed FFmpeg.
2. Quick use of FFmpeg
If you are not a professional user of audio and video, you can only watch this part of the common operations of FFmpeg, and the more complex operations that follow can be "watched on demand".
2.1 Conversion format
The simplest and most commonly used command to convert FFmpeg format is:
ffmpeg -i input.xxx output.xxx
To convert mp4 and flv formats, the command is as follows:
ffmpeg -i input.flv output.mp4
#或者
ffmpeg -i input.mp4 output.flv
To convert mp4 and webm formats, the command is as follows:
ffmpeg -i input.mp4 output.webm
#或者
ffmpeg -i input.webm output.mp4
2.2 Compressed video
The commands for FFmpeg to compress video are as follows:
ffmpeg -i input.mp4 -r 10 -b:a 32k output.mp4 #对它降低fps和音频码率的方法大大压缩文件大小,而清晰度不变。
#或者
ffmpeg -i input.mp4 -vcodec libx264 -crf 20 output.mp4 #采用H.264视频压缩算法和AAC音频压缩算法,视频帧率10fps,音频码率32k
#或者是
ffmpeg -i wzfou.mp4 -crf 20 wzfou.mp4
ffmpeg -i wzfou1.flv -crf 20 wzfou1.mp4
ffmpeg -i wzfou1.mp4 -crf 30 wzfou30.mp4
ffmpeg -i 480p.mp4 480p.webm
2.3 Convert gif
To convert video to gif, the command is as follows:
#把视频的前 30 帧转换成一个 Gif
ffmpeg -i input_video.mp4 -vframes 30 -y -f gif output.gif

#将视频转成 gif 将输入的文件从 (-ss) 设定的时间开始以 10 帧频率,输出到 320x240 大小的 gif 中,时间长度为 -t 设定的参数。
ffmpeg -ss 00:00:00.000 -i input.mp4 -pix_fmt rgb24 -r 10 -s 320x240 -t 00:00:10.000 output.gif
3. FFmpeg video operation
The command parameters of FFmpeg are as follows:

Related instructions:
-crt: This option will directly affect the bit rate of the output video. After setting this parameter, setting -b to specify the bit rate will not take effect. The value range of crt is 0-50, 0 is distortion-free encoding, it is recommended 18-28.
-preset: Specify the encoding configuration. x264 provides some preset values, and these preset values can be specified through preset. The preset mainly affects the speed of encoding and does not greatly affect the quality of the encoded results.
After executing a transcoding command, adjust the -crf parameter value to 19, 20, 28, and 51 respectively, and re-transcode the output into different MP4 files. Record the data and compare it as follows:
Source file Size Reduction ratio
crf = 18 46.3 < x2> 21%
crf = 19 < x2> 36.7 <x2 > 33%
crf = 20 31.2 < x2> 43%
crf = 28 26.5 83%
crf = 51 1.25 97 %
3.1 Specify conversion format
Generally, FFmpeg will select the most appropriate container format and encoding format based on the file format, or you can also specify it manually. For example:
ffmpeg -i out.ogv -vcodec h264 out.mp4
ffmpeg -i out.ogv -vcodec mpeg4 out.mp4
ffmpeg -i out.ogv -vcodec libxvid out.mp4
ffmpeg -i out.mp4 -vcodec wmv1 out.wmv
ffmpeg -i out.mp4 -vcodec wmv2 out.wmv
-i is followed by the input file name. -vcodec is followed by the encoding format, h264 is the best, but it is not installed by default on Windows systems. If you want to insert a ppt video, it is most appropriate to choose wmv1 or wmv2.
There are also additional options: -r specifies the frame rate, -s specifies the resolution, -b specifies the bit rate; at the same time, the audio channel can be modified Transcoding, -acodec specifies the audio encoding, -ab specifies the audio bit rate, -ac specifies the number of channels, for example:
ffmpeg -i out.ogv -s 640x480 -b 500k -vcodec h264 -r 29.97 -acodec libfaac -ab 48k -ac 2 out.mp4
Convert the format as it is, that is, keep the original video and audio encoding format. The command is as follows:
ffmpeg -i input.flv -vcodec copy -acodec copy out.mp4 #-vcodec copy 和 -acodec copy 表示所使用的视频和音频编码格式,为原样拷贝。
3.2 Merge MP4 videos
FFmpeg can merge multiple videos. It is best to convert mp4 to ts with lossless quality first and then merge them. The command is as follows:
ffmpeg -i 1.mp4 -vcodec copy -acodec copy -vbsf h264_mp4toannexb 1.ts
ffmpeg -i 2.mp4 -vcodec copy -acodec copy -vbsf h264_mp4toannexb 2.ts
ffmpeg -i "concat:1.ts|2.ts" -acodec copy -vcodec copy -absf aac_adtstoasc output.mp4
3.3 Change resolution size
If you want to adjust the resolution of the video, you can use the following command:
ffmpeg -i input.mp4 -filter:v scale=1280:720 -c:a copy output.mp4
# or
ffmpeg -i input.mp4 -s 1280x720 -c:a copy output.mp4
If you want to adjust the aspect ratio of your video, you can use the following command:
ffmpeg -i input.mp4 -aspect 16:9 output.mp4
#常见的宽高比:16:9、4:3、16:10、5:4
3.4 Convert video bitrate
The main parameters related to ffmpeg bit rate are -minrate, maxrate, -b:v. The commands are as follows:
ffmpeg -i input.mp4 -b:v 2000k output.mp4

#把原始视频转换成 2 Mbps 码率视频。ffmpeg 官方建议,在设置 -b:v 时,同时加上 -bufsize 用于设置码率控制缓冲器大小,让整体码率更加趋近于希望的值,减少波动。
ffmpeg -i input.mp4 -b:v 2000k -bufsize 2000k output.mp4

# -minrate 和 -maxrate 比较简单,设置码率不要低于或者超过某一个阈值
ffmpeg -i input.mp4 -b:v 2000k -bufsize 2000k -maxrate 2500k output.mp4
3.5 Edit and crop videos
If you want to change the interception of part of the video or keep a certain part of the video, the command is as follows:
ffmpeg -i a.mov -ss 00:00:21 -t 00:00:10 -acodec aac -vcodec h264 -strict -2 out.mp4
#其中 -ss 00:00:21 表示开始剪辑的位置(时间点),-t 00:00:10 表示剪辑的长度,即 10 秒钟

ffmpeg -i a.mov -strict -2 -vf crop=1080:1080:0:420 out.mp4
#将竖向的视频 1080 x 1920,保留中间 1080×1080 部分,其中的 crop=1080:1080:0:420 才裁剪参数,具体含义是 crop=width:height:x:y,其中 width 和 height 表示裁剪后的尺寸,x:y 表示裁剪区域的左上角坐标。比如当前这个示例,我们只需要保留竖向视频的中间部分,所以 x 不用偏移,故传入0,而 y 则需要向下偏移:(1920 – 1080) / 2 = 420
4. Picture operation
4.1 Merge pictures into videos
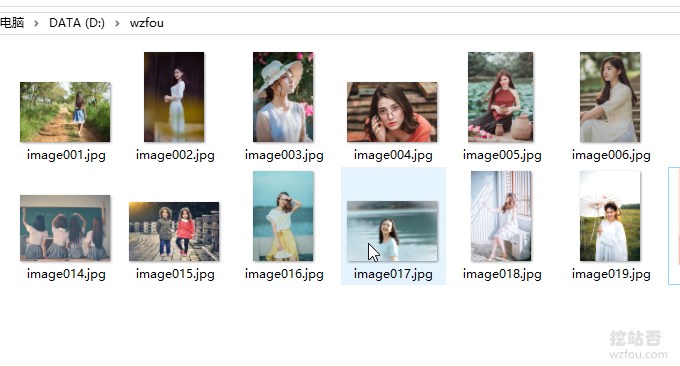
First, put the pictures you want to merge into a folder, and then rename them as: img001.png, img002.png, img003.png, so.

Finally, execute the command to merge pictures into videos:
ffmpeg -framerate 24 -i img%03d.png output.mp4
#或者
ffmpeg -r 0.5 -i  img%03d.jpg  video.avi
4.2 Image and video conversion
The command is as follows:
#将图片序列合成视频
ffmpeg -f image2 -i image%d.jpg video.mpg

#将视频分解成图片序列
ffmpeg -i video.mpg image%d.jpg

#截取一张352x240尺寸大小的,格式为jpg的图片:
ffmpeg -i test.asf -y -f image2 -t 0.001 -s 352x240 a.jpg

#把视频的前30帧转换成一个Animated Gif :
ffmpeg -i test.asf -vframes 30 -y -f gif a.gif

#在视频的第8.01秒处截取 352*240 的缩略图
ffmpeg -i test2.asf -y -f image2 -ss 08.010 -t 0.001 -s 352x240 b.jpg
ffmpeg -r 0.5 -i d:/tmpImg/image%04d.jpg -i d:/time.mp3 -vcodec mpeg4 d:/video5.avi
5. Commonly used commands of FFmpeg
The following are common commands for ffmpeg format conversion, video compression, merging and cutting videos:
# 去掉视频中的音频
ffmpeg -i input.mp4 -vcodec copy -an output.mp4
// -an: 去掉音频;-vcodec:视频选项,一般后面加copy表示拷贝

# 提取视频中的音频
ffmpeg -i input.mp4 -acodec copy -vn output.mp3
// -vn: 去掉视频;-acodec: 音频选项, 一般后面加copy表示拷贝

# 音视频合成
ffmpeg -y –i input.mp4 –i input.mp3 –vcodec copy –acodec copy output.mp4
// -y 覆盖输出文件

#剪切视频
ffmpeg -ss 0:1:30 -t 0:0:20 -i input.mp4 -vcodec copy -acodec copy output.mp4
// -ss 开始时间; -t 持续时间

#视频截图
ffmpeg –i test.mp4 –f image2 -t 0.001 -s 320x240 image-%3d.jpg
// -s 设置分辨率; -f 强迫采用格式fmt;

# 视频分解为图片
ffmpeg –i test.mp4 –r 1 –f image2 image-%3d.jpg
// -r 指定截屏频率

# 将图片合成视频
ffmpeg -f image2 -i image%d.jpg output.mp4

#视频拼接
ffmpeg -f concat -i filelist.txt -c copy output.mp4

#将视频转为gif
ffmpeg -i input.mp4 -ss 0:0:30 -t 10 -s 320x240 -pix_fmt rgb24 output.gif
// -pix_fmt 指定编码

#将视频前30帧转为gif
ffmpeg -i input.mp4 -vframes 30 -f gif output.gif

#旋转视频
ffmpeg -i input.mp4 -vf rotate=PI/2 output.mp4

#缩放视频
ffmpeg -i input.mp4 -vf scale=iw/2:-1 output.mp4
// iw 是输入的宽度, iw/2就是一半;-1 为保持宽高比

#视频变速
ffmpeg -i input.mp4 -filter:v setpts=0.5*PTS output.mp4

#音频变速
ffmpeg -i input.mp3 -filter:a atempo=2.0 output.mp3

#音视频同时变速,但是音视频为互倒关系
ffmpeg -i input.mp4 -filter_complex "[0:v]setpts=0.5*PTS[v];[0:a]atempo=2.0[a]" -map "[v]" -map "[a]" output.mp4


# 视频添加水印
ffmpeg -i input.mp4 -i logo.jpg -filter_complex [0:v][1:v]overlay=main_w-overlay_w-10:main_h-overlay_h-10[out] -map [out] -map 0:a -codec:a copy output.mp4
// main_w-overlay_w-10 视频的宽度-水印的宽度-水印边距;

# 截取视频局部
ffmpeg -i in.mp4 -filter:v "crop=out_w:out_h:x:y" out.mp4

# 截取部分视频,从[80,60]的位置开始,截取宽200,高100的视频
ffmpeg -i in.mp4 -filter:v "crop=80:60:200:100" -c:a copy out.mp4

# 截取右下角的四分之一
ffmpeg -i in.mp4 -filter:v "crop=in_w/2:in_h/2:in_w/2:in_h/2" -c:a copy out.mp4

# 截去底部40像素高度
ffmpeg -i in.mp4 -filter:v "crop=in_w:in_h-40" -c:a copy out.mp4
6. FFmpeg software effects
The following is a demonstration of the FFmpeg compressed video effect (the video size is less than 1.3MB):
The following is an animated picture converted by FFmpeg to WebP (less than 700KB, click to watch the animation):
7. Summary
FFmpeg is a format conversion artifact. Although it is not as convenient to use as the client, as long as you master a few basic commands, you can complete the conversion and volume compression of MP4, FLV, Gif, WebP and other formats. It is common on Windows and Linux platforms.
At the same time, FFmpeg is also suitable for professional users. If you have specific requirements for video, audio and other formats, you can refer to the official parameters of FFmpeg. You only need to add a few parameters to the conversion format and compressed video. The conversion and compression speed is very fast. .