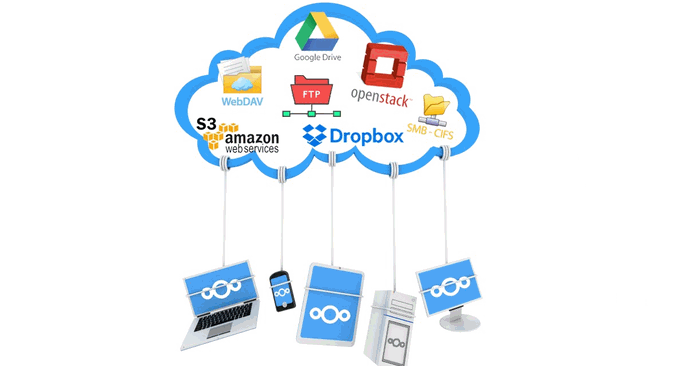
NextCloud was founded by Frank Karlitschek, co-founder of original ownCloud. It inherits the core technology of original ownCloud and has many innovations. In terms of functions, NextCloud is similar to ownCloud, and even richer. In terms of user experience, NextCloud is very easy to install and use. The most important thing is that NextCloud is completely open source and free.
NextCloud is not only a private cloud network disk platform, but also supports simultaneous and collaborative use by multiple users. NextCloud supports account registration and can enable two-step verification for the account to ensure account security. At the same time, NextCloud can set validity periods for publicly shared files, and directly supports online preview and playback of uploaded videos, music, Office documents, etc.
NextCloud also provides hundreds of free applications and plug-ins, which can turn NextCloud into an online document sharing and editing platform, music and video entertainment platform, and file storage and download platform. Of course, if you install NextCloud manually, you must configure the environment for these plug-ins yourself.

This article will share a tutorial on how to manually install NextCloud. For more webmaster-built services and platforms, you can also try:
- Lsyncd builds synchronization mirror-use Lsyncd to achieve real-time synchronization between local and remote servers
- VestaCP and WHMCS integration tutorial - realize self-service activation of virtual host and sales of host space products
- Integration method of ISPConfig and WHMCS - automatically activate virtual host and management space users
PS: Updated on September 20, 2017, Friends who find manual installation troublesome can use the one-click installation method. Reference: Nextcloud personal cloud storage is an excellent choice: one-click automatic installation method and cloud disk usage experience.
1. LAMP installation NextCloud
NextCloud official website:
- HTTPS://next cloud.com/
Prepare the LAMP environment. LAMP refers to Apache, MysqL or Mariadb, and PHP environments. NextCloud officially recommends using Apache to run NextCloud, and it comes with .htaccess rules. For Nginx, you still need to manually write NextCloud's URL rewriting rules. The following methods are recommended to install LAMP with one click:
- Linux VPS website building tool LNMP 1.4 installation and use-SSL automatic configuration renewal and multi-version PHP support
- OneinStack one-click installation script - easily deploy Let’s Encrypt certificate and configure HTTPS site
Both LNMP 1.4 and OneinStack can install the LAMP environment with one click. Here I use OneinStack as an operation demonstration. When selecting components when installing OneinStack, just select Apache. It is recommended to use PHP 7.0 or above, and Mariadb is recommended for the database. Other caching components can also be installed.

Bind the domain name and add the SSL certificate. OneinStack can directly add an SSL certificate when adding a website. At the same time, it is required that the bound domain name must be resolved to the server's IP in advance, so that it can generate a Lets free certificate with one click.

Download the NextCloud level package and install it. Go to the official website: https://nextcloud.com/install/#instructions-server, download the latest package, unzip it and upload it to the root directory of the website.

Create a new database for NextCloud.
PS: Updated on September 1, 2018. Thanks to baoang for the reminder. When installing NC, you can directly use the root account in the database. There is no need to set up another pan account. Because NC will not use this account, but only uses this account for installation. After the installation is completed, it will generate its own database account in the format of nc_administrator ID, such as nc_qi.

Accessing the domain name will automatically lead you to the NextCloud installation page. Fill in your administrator account and password, and then set the file storage path below. It is best not to be in the same directory as the program. At the same time, fill in the SQL database information to complete the installation. (Click to enlarge)

Once completed, you can log in to the NextCloud backend, which is NextCloud's user management interface. (Click to enlarge)

2. LNMP installation NextCloud
Preparing the LNMP environment is the same as above, except that you can select the Nginx environment when installing LNMP 1.4 and OneinStack, and other components can be installed selectively. If Zend OPcache is installed, an error may be prompted during installation: "PHP is set to remove inline blocks, which will cause multiple core applications to be unable to access .
Solution: Modify the Opcache parameters in php.ini. If it is Oneinstack, you need to modify it in /usr/local/php/etc/php.d/ext-opcache.ini. Find this code and change it to: opcache.save_comments=1, because the default is 0, just restart php-fpm after changing it.
Write URL address rewriting rules. An error occurred: No input file specified. Mainly because Nginx still needs to write its own rewrite rules. You can copy and paste the following rules into /usr/local/nginx/conf/vhost/your website.conf. Due to the rules If there are too many, you can also create a separate file and then reference it in your website.conf. The specific rules are as follows:
  #(可选)添加如下header主要为了安全
    add_header X-Content-Type-Options nosniff;
    add_header X-XSS-Protection "1; mode=block";
    add_header X-Robots-Tag none;
    add_header X-Download-Options noopen;
    add_header X-Permitted-Cross-Domain-Policies none;
    #(可选)为了支持user_webfinger app
    rewrite ^/.well-known/host-meta /public.php?service=host-meta last;
    rewrite ^/.well-known/host-meta.json /public.php?service=host-meta-json last;

    #日历和联系人,建议加上
    location = /.well-known/carddav {
    return 301 $scheme://$host/remote.php/dav;
    }
    location = /.well-known/caldav {
    return 301 $scheme://$host/remote.php/dav;
    }
    #设置上传文件的最大大小
    client_max_body_size 512M;
    fastcgi_buffers 64 4K;
    #将所有请求转发到index.php上
    location / {
    rewrite ^ /index.php$uri;
    }
    #安全设置,禁止访问部分敏感内容
    location ~ ^/(?:build|tests|config|lib|3rdparty|templates|data)/ {
    deny all;
    }
    location ~ ^/(?:.|autotest|occ|issue|indie|db_|console) {
    deny all;
    }

    #默认有,替换原来的就行
    location ~ ^/(?:index|remote|public|cron|core/ajax/update|status|ocs/v[12]|updater/.+|ocs-provider/.+).php(?:$|/) {
    fastcgi_split_path_info ^(.+.php)(/.*)$;
    fastcgi_param PATH_INFO $fastcgi_path_info;
    fastcgi_param modHeadersAvailable true;
    fastcgi_param front_controller_active true;
    fastcgi_pass unix:/dev/shm/php-cgi.sock; #这边我改过,参照原来的
    fastcgi_intercept_errors on;
    fastcgi_request_buffering off;
    include fastcgi.conf;
    }

    #安全设置,禁止访问部分敏感内容
    location ~ ^/(?:updater|ocs-provider)(?:$|/) {
    try_files $uri/ =404;
    index index.php;
    }

    location ~ .(?:css|js|woff|svg|gif)$ {
    try_files $uri /index.php$uri$is_args$args;
    add_header Cache-Control "public, max-age=15778463";
    add_header X-Content-Type-Options nosniff;
    add_header X-XSS-Protection "1; mode=block";
    add_header X-Robots-Tag none;
    add_header X-Download-Options noopen;
    add_header X-Permitted-Cross-Domain-Policies none;
    access_log off;
    }
    location ~ .(?:png|html|ttf|ico|jpg|jpeg)$ {
    try_files $uri /index.php$uri$is_args$args;
    access_log off;
    }
fileinfoMemcachedRedis, etc. can be installed with one click through OneinStack.

NextCloud security and performance optimization: This kind of prompt can usually be seen in NextCloud's server management. It is recommended to install just one cache class directly. Installing too many is of no use.
For the security and performance of your service, please configure all settings correctly. We will perform some automated checks to help you do this. Please check the "Tips" section and related documentation for details.
PHP module ‘fileinfo’ is missing. We strongly recommend enabling this module to get the most accurate results when MIME type detection.
The HTTP request header "Strict-Transport-Security" is not configured for at least "15552000" seconds. For enhanced security, we recommend enabling HSTS as described in Security Tips.
Memcache is not configured. If available, please configure memcache to enhance performance. Please see our documentation for more information.
PHP's component OPcache is not configured correctly. To provide better performance, we recommend that in the php.ini file Use the following settings:opcache.enable=1
opcache.enable_cli=1
opcache.interned_strings_buffer=8
opcache.max_accelerated_files=10000
opcache.memory_consumption=128
opcache.save_comments=1
opcache. revalidate_freq=1
NextCloud adds Memcached cache. Modify the config.php file in the config directory under the program directory and add the following to the configuration file. This is multiple Memcached instances. You can modify each one by yourself:
'memcache.local' => 'OCMemcacheAPCu',
'memcache.distributed' => 'OCMemcacheMemcached',
'memcached_servers' => array(
     array('localhost', 11211),
     array('server1.example.com', 11211),
     array('server2.example.com', 11211),
     ),
NextCloud adds Redis cache. Add the following in the configuration file, this is connected through TCP
'memcache.local' => 'OCMemcacheRedis',
'redis' => array(
     'host' => 'localhost',
     'port' => 6379,
      ),
There are also better performing UNIX connections
'memcache.local' => 'OCMemcacheRedis',
'redis' => array(
     'host' => '/var/run/redis/redis.sock',
     'port' => 0,
     'dbindex' => 0,
     'password' => 'secret',
     'timeout' => 1.5,
      ),
At the same time, the official also recommends adding the following to store file locks
'memcache.locking' => 'OCMemcacheRedis',Everything works fine when Nginx runs NextCloud.

3. Add applications to NextCloud
NextCloud provides a rich set of built-in applications, and these applications can be downloaded and installed directly in the background of NextCloud, a bit like our WordPress plug-in. These introduce some useful NextCloud plug-ins, I believe you will definitely use them.
SMTP sending and limiting the maximum upload file. This option can be set directly in the background settings of NextCloud. SMTP allows us to call a third-party sending service to send NextCloud emails. The built-in PHP can also send emails, but it will basically be judged by major mailboxes. for spam.

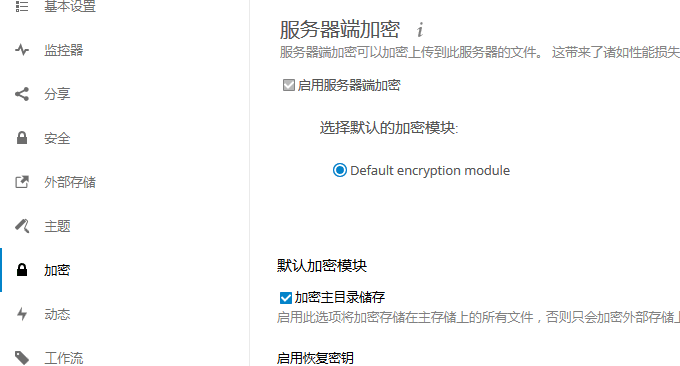
Data storage encryption and plug-in storage. First activate the two plug-ins, Default encryption module and External storage support, in the NextCloud application.

Enabling data encryption requires caution: Because once data encryption is enabled, all files uploaded to the server will be encrypted on the server only if the enabled encryption module supports decryption and all prerequisites are met (for example: Set the recovery key) to unencrypt. Please note that encryption increases file size and encryption alone cannot ensure system security. You will need to set a recovery key at the same time.

Plug-in storage mainly allows NextCloud to mount third-party storage applications by logging into OC through SMB/CIFS. It is a bit troublesome to enable this plug-in. It may prompt: "smbclient" is not installed. Installation commands: apt-get install smbclient and apt-get install php-smbclient.

4. Summary
As for choosing Apache or Nginx to run NextCloud, it mainly depends on your familiarity with Nginx or Apache. LNMP 1.4 and OneinStack have done a good job in optimizing Nginx. HTTP 2.0, SSL certificates, caching components and PHP functions can all be used with one click. Installation and configuration save a lot of trouble.

NextCloud's basic functions such as picture preview and music video online playback are no problem. However, I encountered a lot of problems when using the NextCloud application. The first problem is that NextCloud's application configuration is difficult, such as Office document plug-ins, RSS online reader plug-ins, etc., all of which require manual configuration of the server environment.
