

Ajenti is a foreign open source free server panel. Its functional design is similar to the VestaCP we introduced before. The panels all support Chinese and come with SSL, Nginx, PHP, MysqL, etc., which can be installed manually. The official website also provides a Key installation script, Ajenti can also be used as a server management panel.
Ajenti V is a virtual host plug-in of Ajenti, mainly used to manage virtual hosts and build websites. Ajenti V basically meets all the functions for website building, such as FTP, database, port, SSL certificate, file management, domain name binding, etc. The combination of Ajenti V and Ajenti is suitable for website building.
This article will share how to install and use Ajenti and Ajenti V server panels. Generally speaking, compared with VestaCP, Ajenti also has shortcomings, such as slow version updates, no forum discussion and exchange, and relatively few Chinese tutorials about Ajenti on the Internet. , Ajenti encountered a lot of problems, so Ajenti is still more suitable for people who like to toss.

For more information about the server panel, you can refer to a special page I created before: Server Control Panel List. Friends who don’t like panels can actually use command tools:
- Linux VPS website building tool LNMP 1.4 installation and use-SSL automatic configuration renewal and multi-version PHP support
- OneinStack one-click installation script - easily deploy Let’s Encrypt certificate and configure HTTPS site
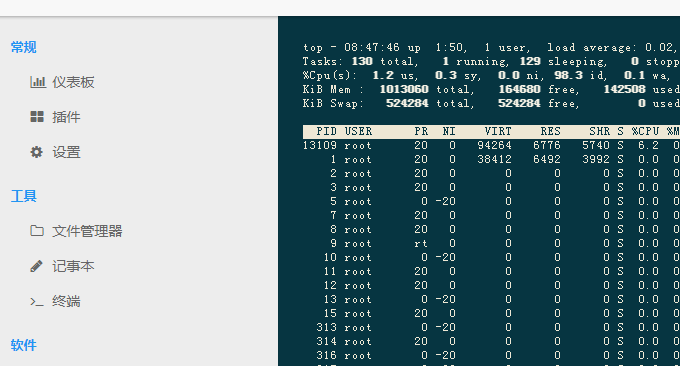
- Summary of Linux system monitoring commands - master CPU, memory, disk IO, etc. to find performance bottlenecks
1. Ajenti 2 installation
Ajenti official website:
- http://AjiaoEnti.org/
Ajenti 2 is the latest version. It has fewer functions than Ajenti 1, but the panel is simpler and lighter. The required operating systems are: Debian 6 or later, Ubuntu Precise or later, CentOS 6 or later, RHEL 6 or later.
1.1 One-click installation package
curl https://raw.githubusercontent.com/ajenti/ajenti/master/scripts/install.sh | sudo bash -s -
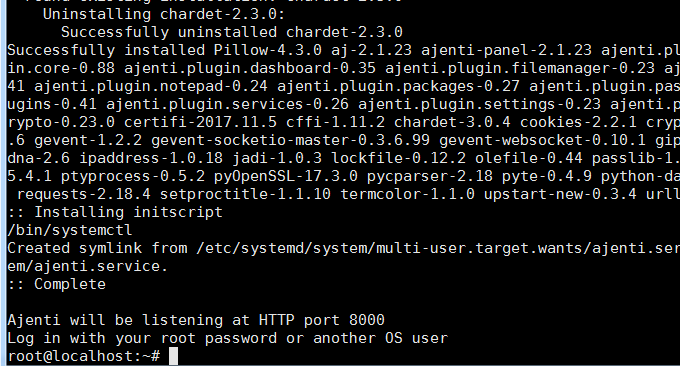
Manual After executing the command, wait for a while and you will see the prompt that Ajenti 2 is successfully installed.
1.2 Manual installation method
Installation dependencies: Debian/Ubuntu
sudo apt-get install build-essential python-pip python-dev python-lxml libffi-dev libssl-dev libjpeg-dev libpng-dev uuid-dev python-dbus
Installation dependencies: RHEL/CentOS
sudo yum install gcc python-devel python-pip libxslt-devel libxml2-devel libffi-devel openssl-devel libjpeg-turbo-devel libpng-devel dbus-python
Upgrade PIP:
sudo pip install 'setuptools>=0.6rc11' 'pip>=6' wheel
Minimal installation:
sudo pip install ajenti-panel ajenti.plugin.dashboard ajenti.plugin.settings ajenti.plugin.plugins
Install together with the plugin:
sudo pip install ajenti-panel ajenti.plugin.dashboard ajenti.plugin.settings ajenti.plugin.plugins ajenti.plugin.filemanager ajenti.plugin.notepad ajenti.plugin.packages ajenti.plugin.services ajenti.plugin.terminal
1.3 Ajenti 2 use
Open: IP+8000 port, use your VPS login account and password to log in to Ajenti 2.

This is the operation interface of Ajenti 2. It has simple functions and a good interface.

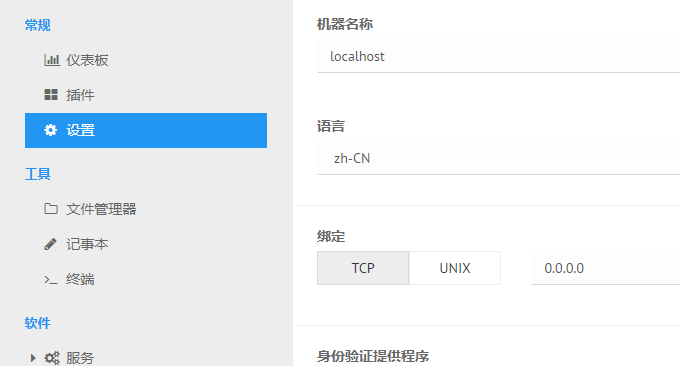
In the settings of Ajenti 2, you can set the language to Chinese, enable SSL, etc.
The file manager that comes with Ajenti 2 is also very easy to use.
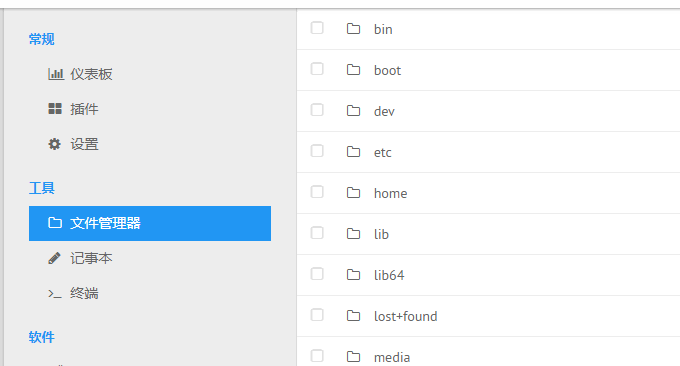
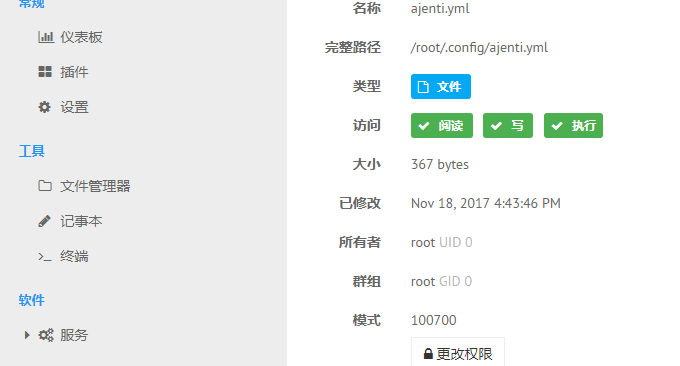
Files on the VPS host can be edited online, modified permissions, moved, copied and other operations.
Ajenti 2 also has a console that can execute commands.
2. Ajenti 1 installation
Ajenti 1 has more functions than Ajenti 2 and can be used with Ajenti V.
2.1 Ajenti 1 manual installation
Debian:
Ajenti requires Debian 6 or later. Debian 5 must have Python 2.6 installed.
Add repository key:
wget http://repo.ajenti.org/debian/key -O- | apt-key add -
Add repository to /etc/apt/sources.list:
echo "deb http://repo.ajenti.org/debian main main debian" >> /etc/apt/sources.list
start installation:
apt-get update && apt-get install ajenti
Start the service:
service ajenti restart
Ubuntu:
Ajenti requires at least Ubuntu 12.04 Precise Pangolin.
Add repository key:
wget http://repo.ajenti.org/debian/key -O- | apt-key add -
Add repository to /etc/apt/sources.list:
echo "deb http://repo.ajenti.org/ng/debian main main ubuntu" >> /etc/apt/sources.list
start installation:
apt-get update && apt-get install ajenti
Start the service:
service ajenti restart
RPM Packages
Add repository key:
wget http://repo.ajenti.org/ajenti-repo-1.0-1.noarch.rpm
rpm -i ajenti-repo-1.0-1.noarch.rpm
start installation:
yum install ajenti
Start the service:
service ajenti restart
2.2 Ajenti 1 use
Prompt for successful installation of Ajenti 1.
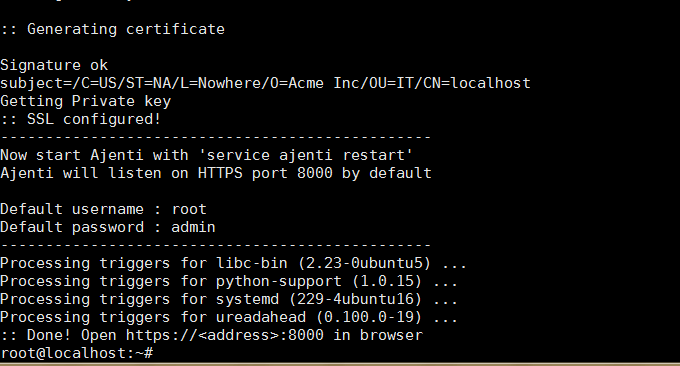
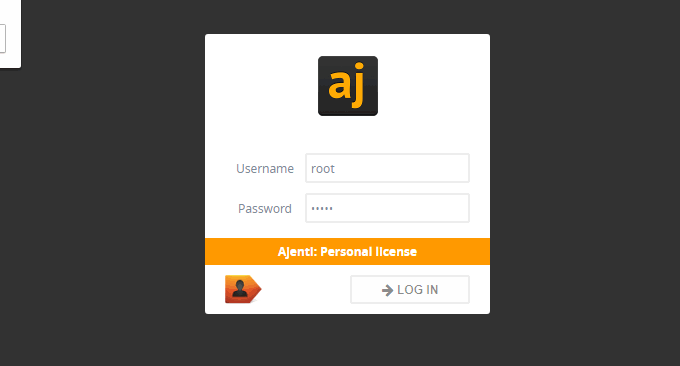
Use IP+8000 to enter Ajenti 1, and use the default account and password: root and admin to log in.
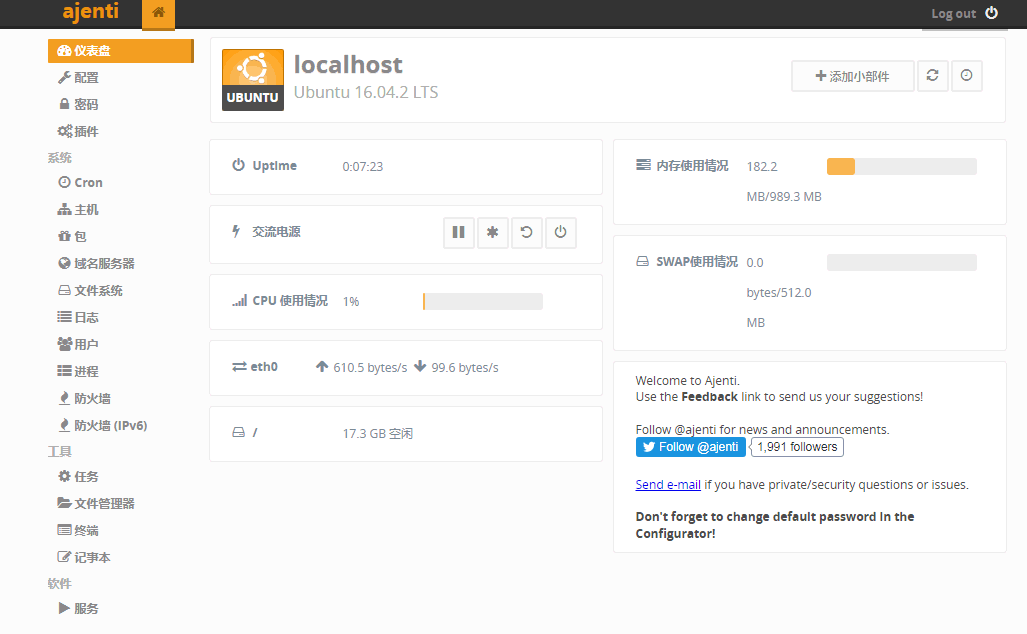
This is the operation interface of Ajenti 1, with dashboard, system, software, tools and other functions. (Click to enlarge)
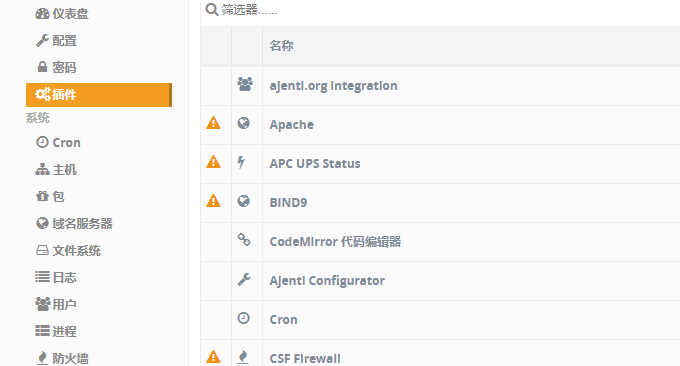
Various components such as APC and Bind9 can be installed in the plug-in option of Ajenti 1.
Hard disk mounts can be managed in the file system.

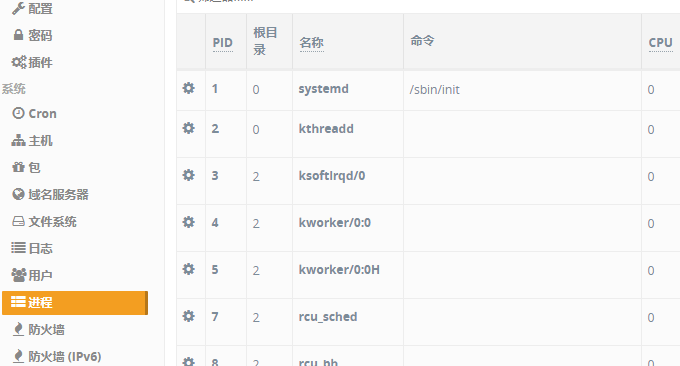
"Processes" can manage system services.
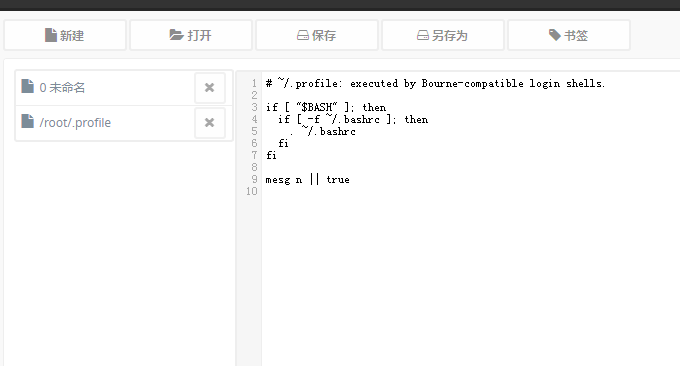
Ajenti 1's file manager can modify file permissions.

You can also edit files online.
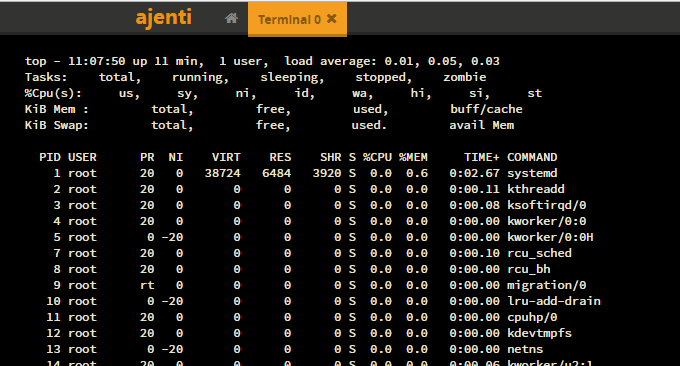
This is the Ajenti 1 console.
3. Ajenti V installation
3.1 Ajenti V installation
Ajenti V can only be used with Ajenti 1. The currently available installation packages for Ajenti V are:
ajenti-v (main program)
ajenti-v-mail (Exim and Courier mail)
ajenti-v-mysql (MySQL DB database)
ajenti-v-php-fpm (PHP support via PHP-FPM)
ajenti-v-php7.0-fpm
ajenti-v-ruby-unicorn (Rails support via Unicorn)
ajenti-v-ruby-puma (Rails support via Puma)
ajenti-v-ftp-pureftpd (FTP account)
ajenti-v-nginx (supported by NGINX webserver)
ajenti-v-python-gunicorn (Python WSGI support via gunicorn)
ajenti-v-nodejs (Node.js support)
First you need to uninstall Apache:
apt-get remove apache2
You can choose the above installation packages according to your own needs. For example, to install the LNMP environment is:
apt-get install ajenti-v ajenti-v-nginx ajenti-v-mysql ajenti-v-php7.0-fpm php7.0-mysql
service ajenti restart
This is a prompt for successful installation of Ajenti V.

3.2 Ajenti V use
After Ajenti V is successfully installed, enter Ajenti 1 again and you will see a "Website" option.
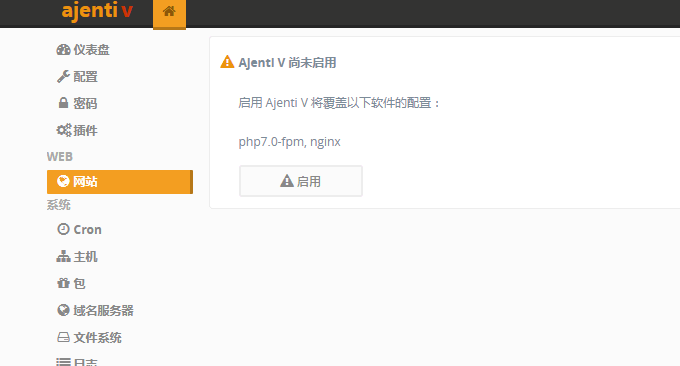
Select Add a website.

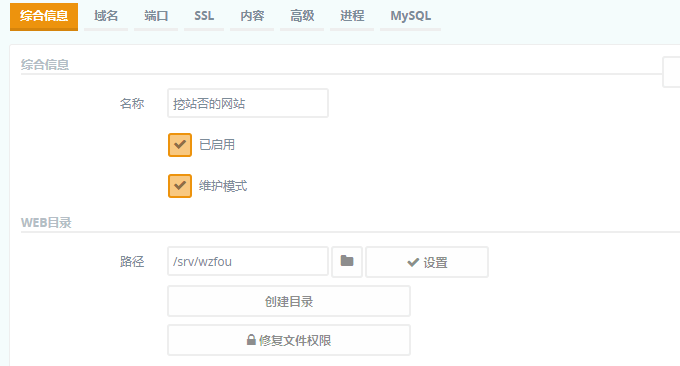
Then enter the website management center and set the root directory path of the website.
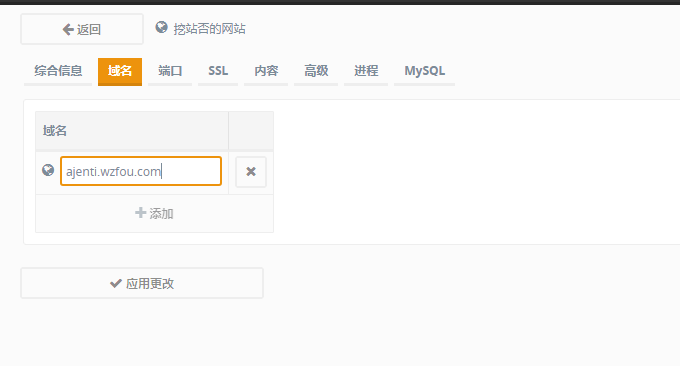
You can bind a domain name in the "Domain name" option.
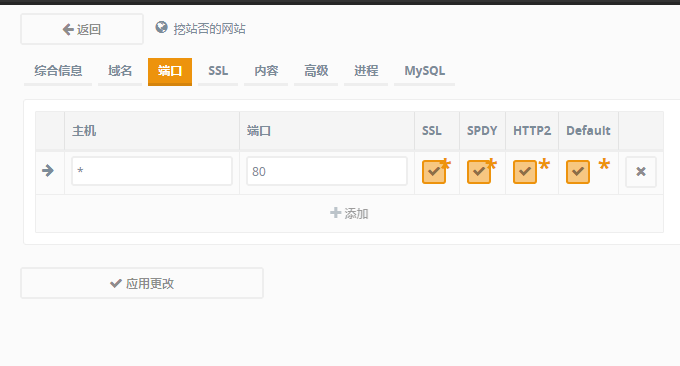
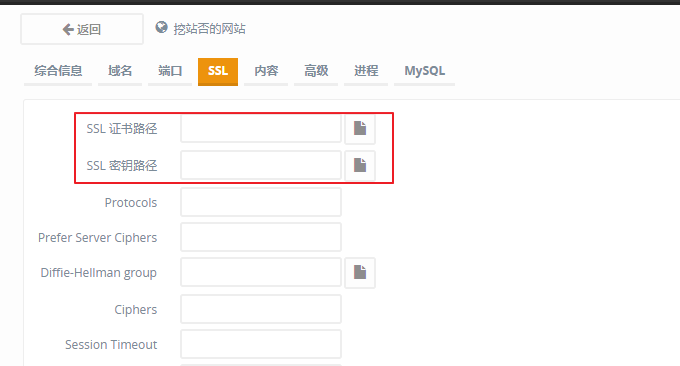
SSL, HTTPS 2, SPDY, etc. can be managed in "Port".
In "SSL" you can add the certificate path.
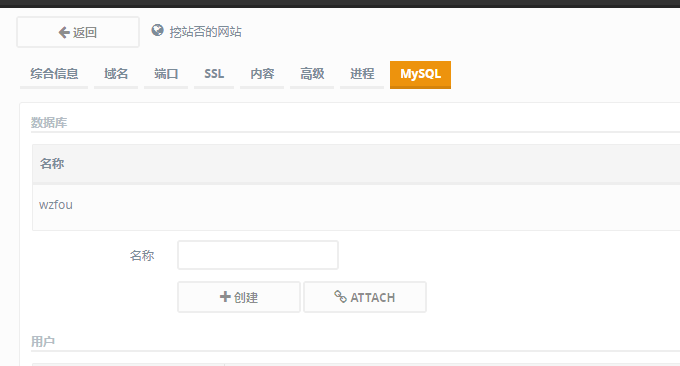
Finally, the database can be managed in MysqL.
4. Summary
In general, Ajenti and Ajenti V are very good VPS host control panels. Functions such as server configuration, system load, CPU memory, plug-in installation, and virtual host management can basically meet our daily website building needs.
Of course, the shortcomings of Ajenti V are that there are slightly fewer website management functions, and although the SSL certificate can be configured by yourself, it does not support the automatic issuance of let's encrypt free certificates. There are relatively few Chinese and English materials related to Ajenti.